Semaglutide Instructions
Step 1
1. Wash your hands with soap and water.
2. Check the name and colored label of your pen, to make sure that it contains Semaglutide. This is especially important if you take more than 1 type of medicine.
3. Pull off the pen cap.
Step 2
1. Check that the Semaglutide medicine in your pen is clear and colorless. Look through the pen window. If Semaglutide looks cloudy or contains particles, do not use the pen.
Step 3
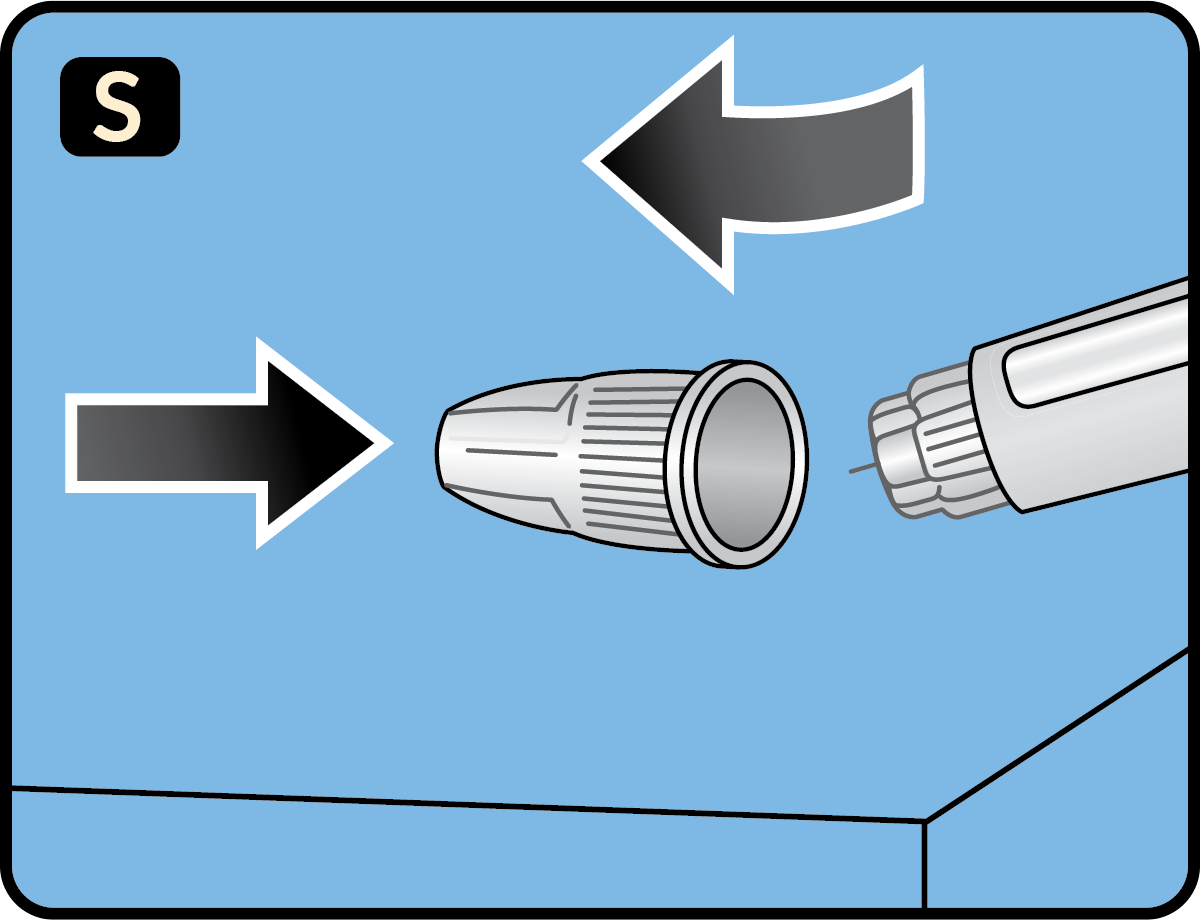
1. Take a new needle, and tear off the paper tab.
2. Do not attach a new needle to your pen until you are ready to give your injection.
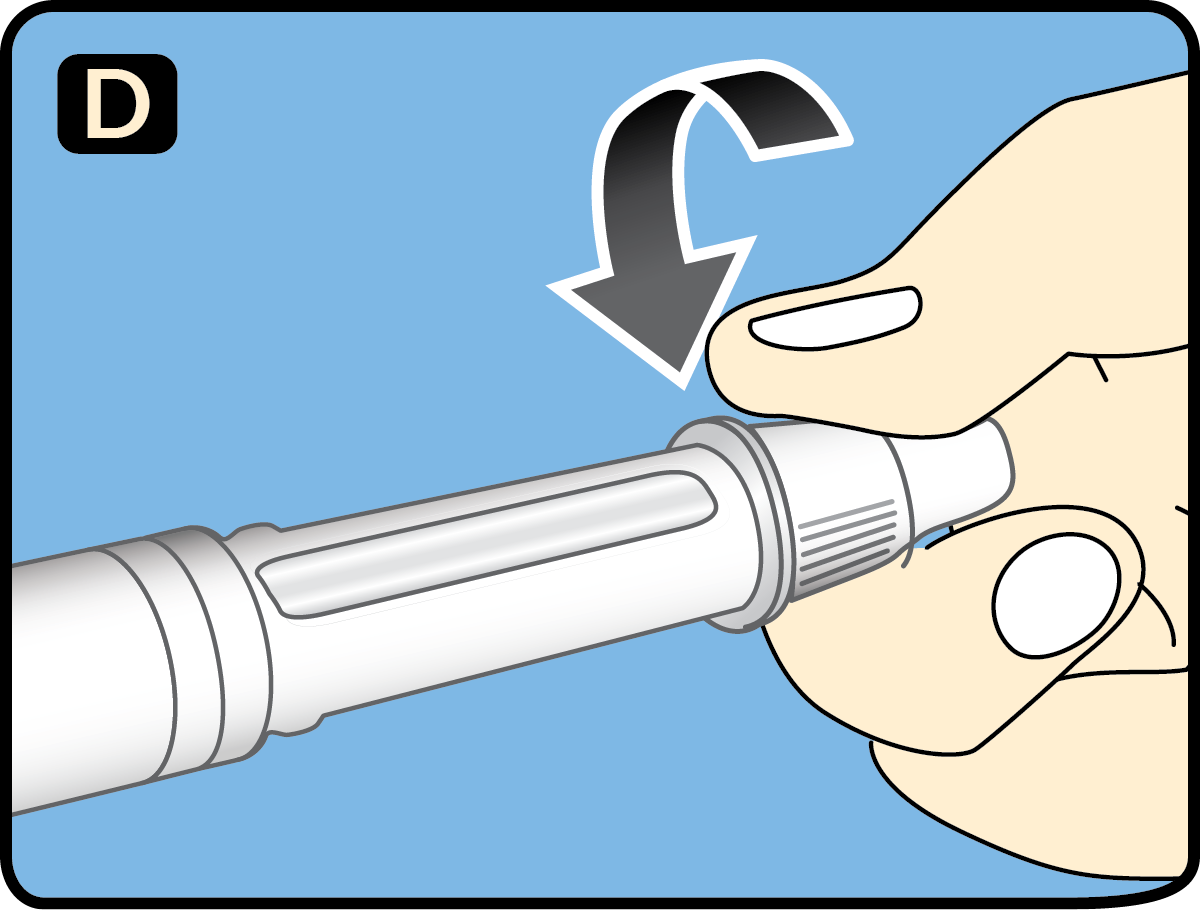
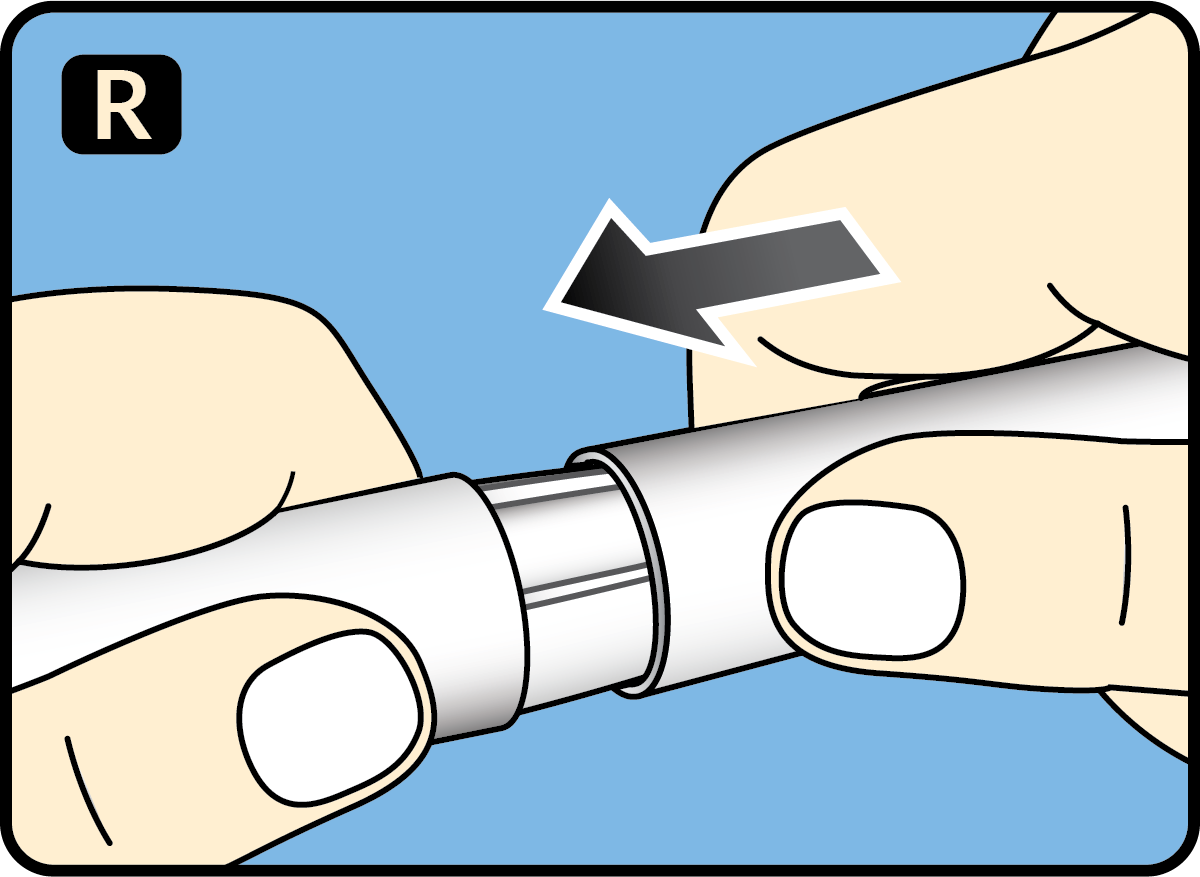
Step 4
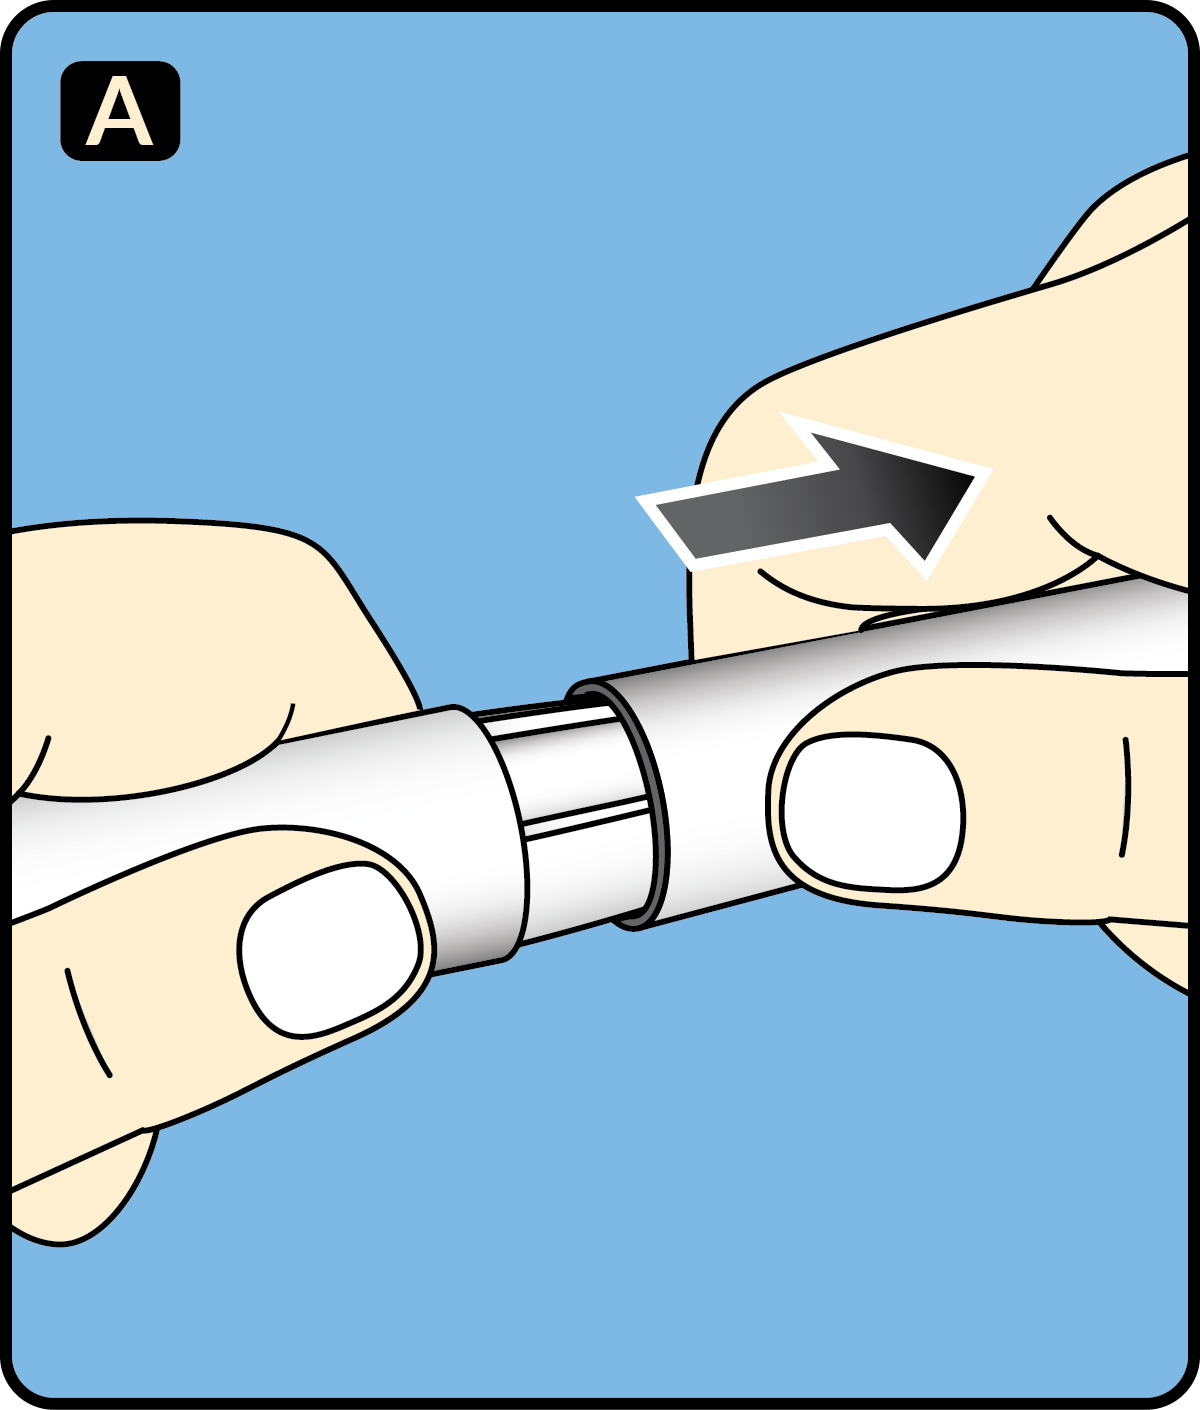
1. Push the needle straight onto the pen. Turn until it is on tight.
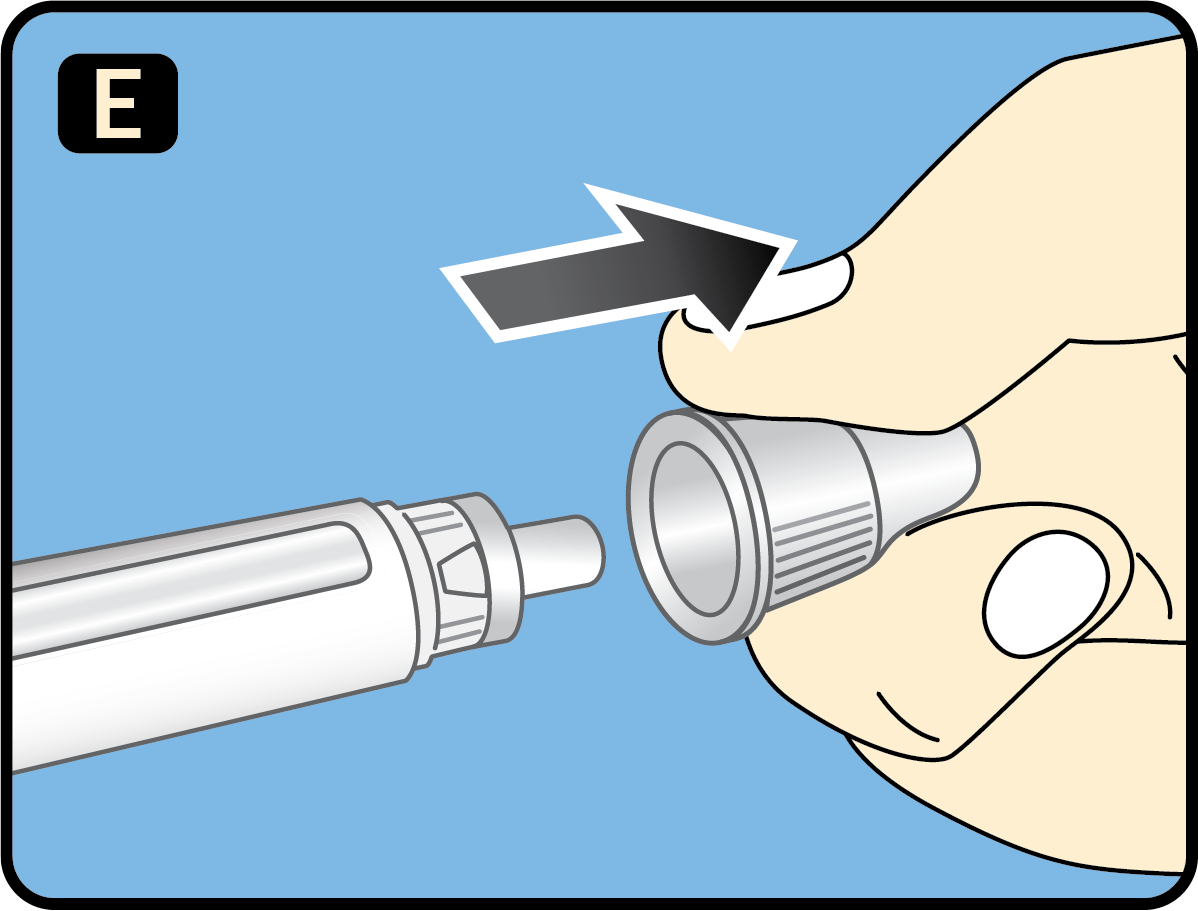
Step 5
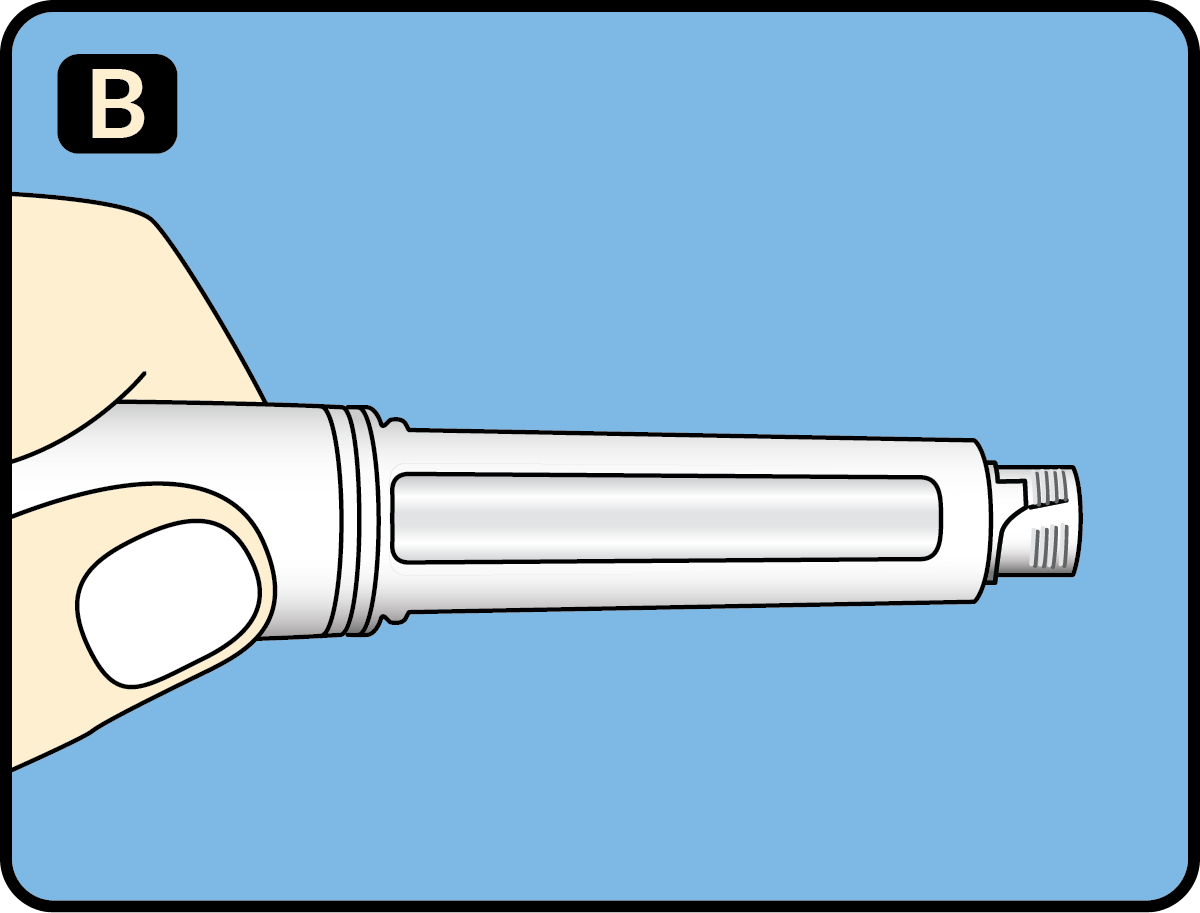
1. The needle is covered by 2 caps. You must remove both caps. If you forget to remove both caps, you will not inject any medicine.
2. Pull off the outer needle cap. Do not throw it away.
Step 6
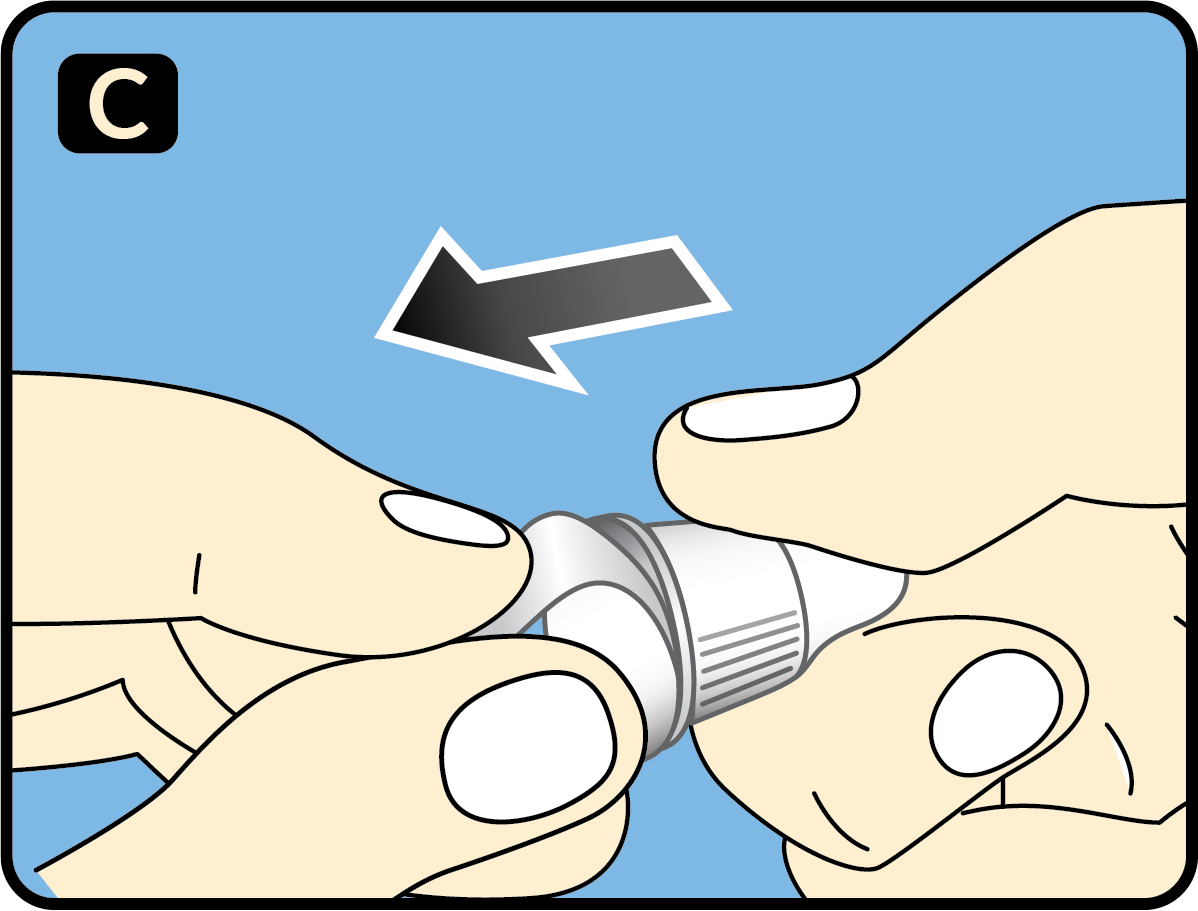
1. Pull off the inner needle cap and throw it away.

Step 7
1. Check the Semaglutide flow before the first injection with each new pen only.
2. Turn the dose selector until the dose counter shows the flow check symbol ▪▪▰

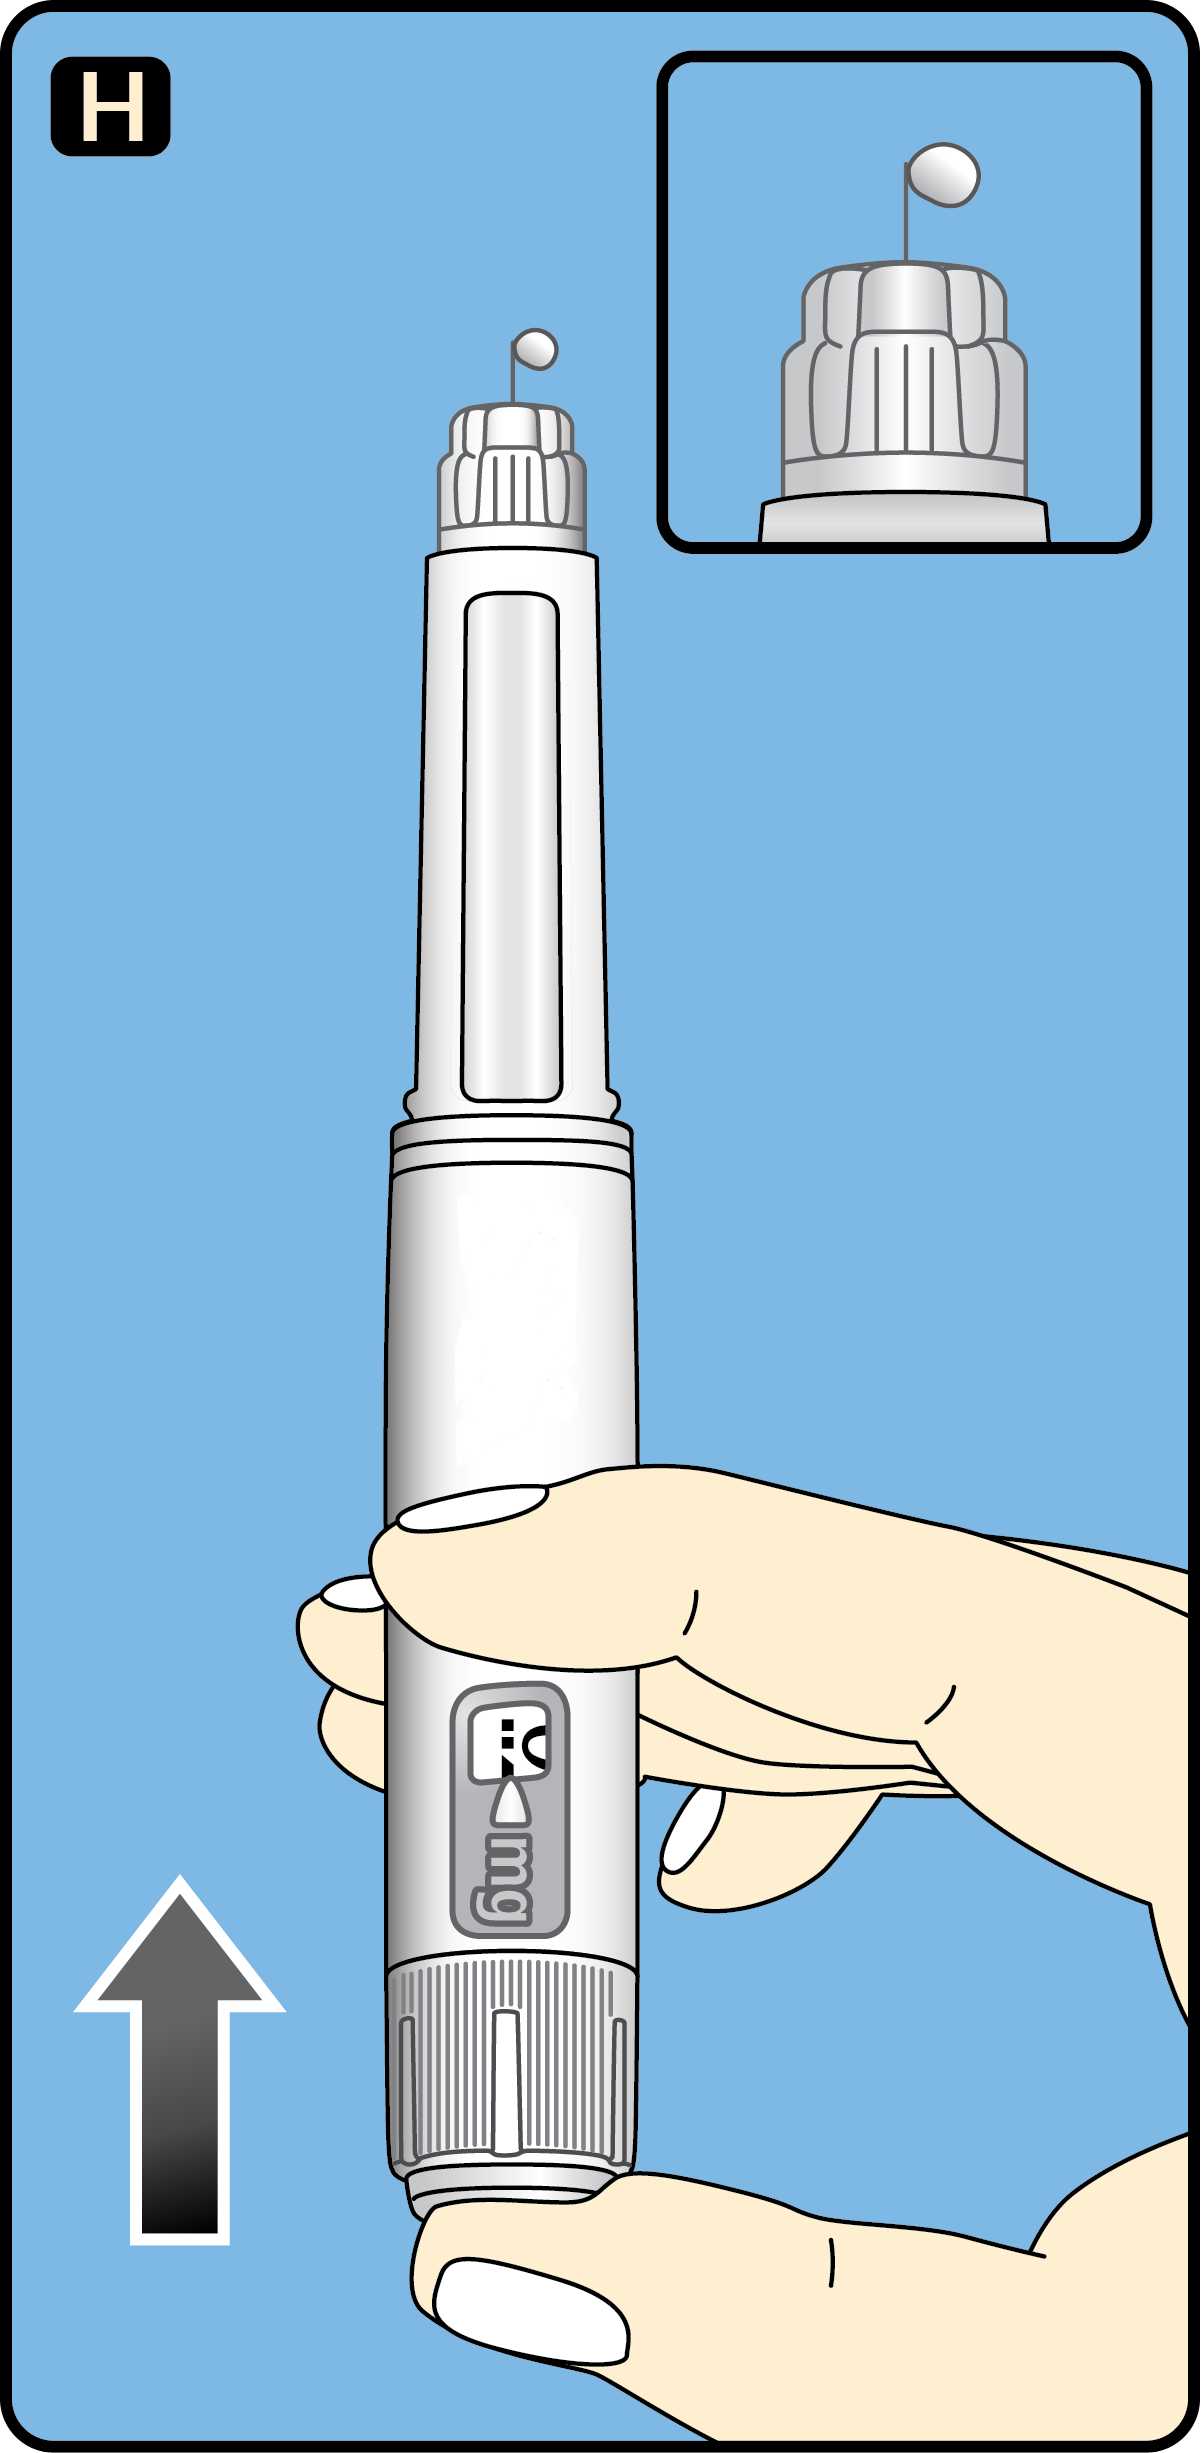
Step 8
1. Hold the pen with the needle pointing up. Press and hold in the dose button until the dose counter shows 0. The 0 must line up with the dose pointer. A drop of Semaglutide will appear at the needle tip.
2. If no drop appears, repeat Step 7 above as shown in Figure G and Figure H up to 6 times.
3. If there is still no drop, change the needle and repeat Step 7 as shown in Figure G and Figure H, 1 more time.
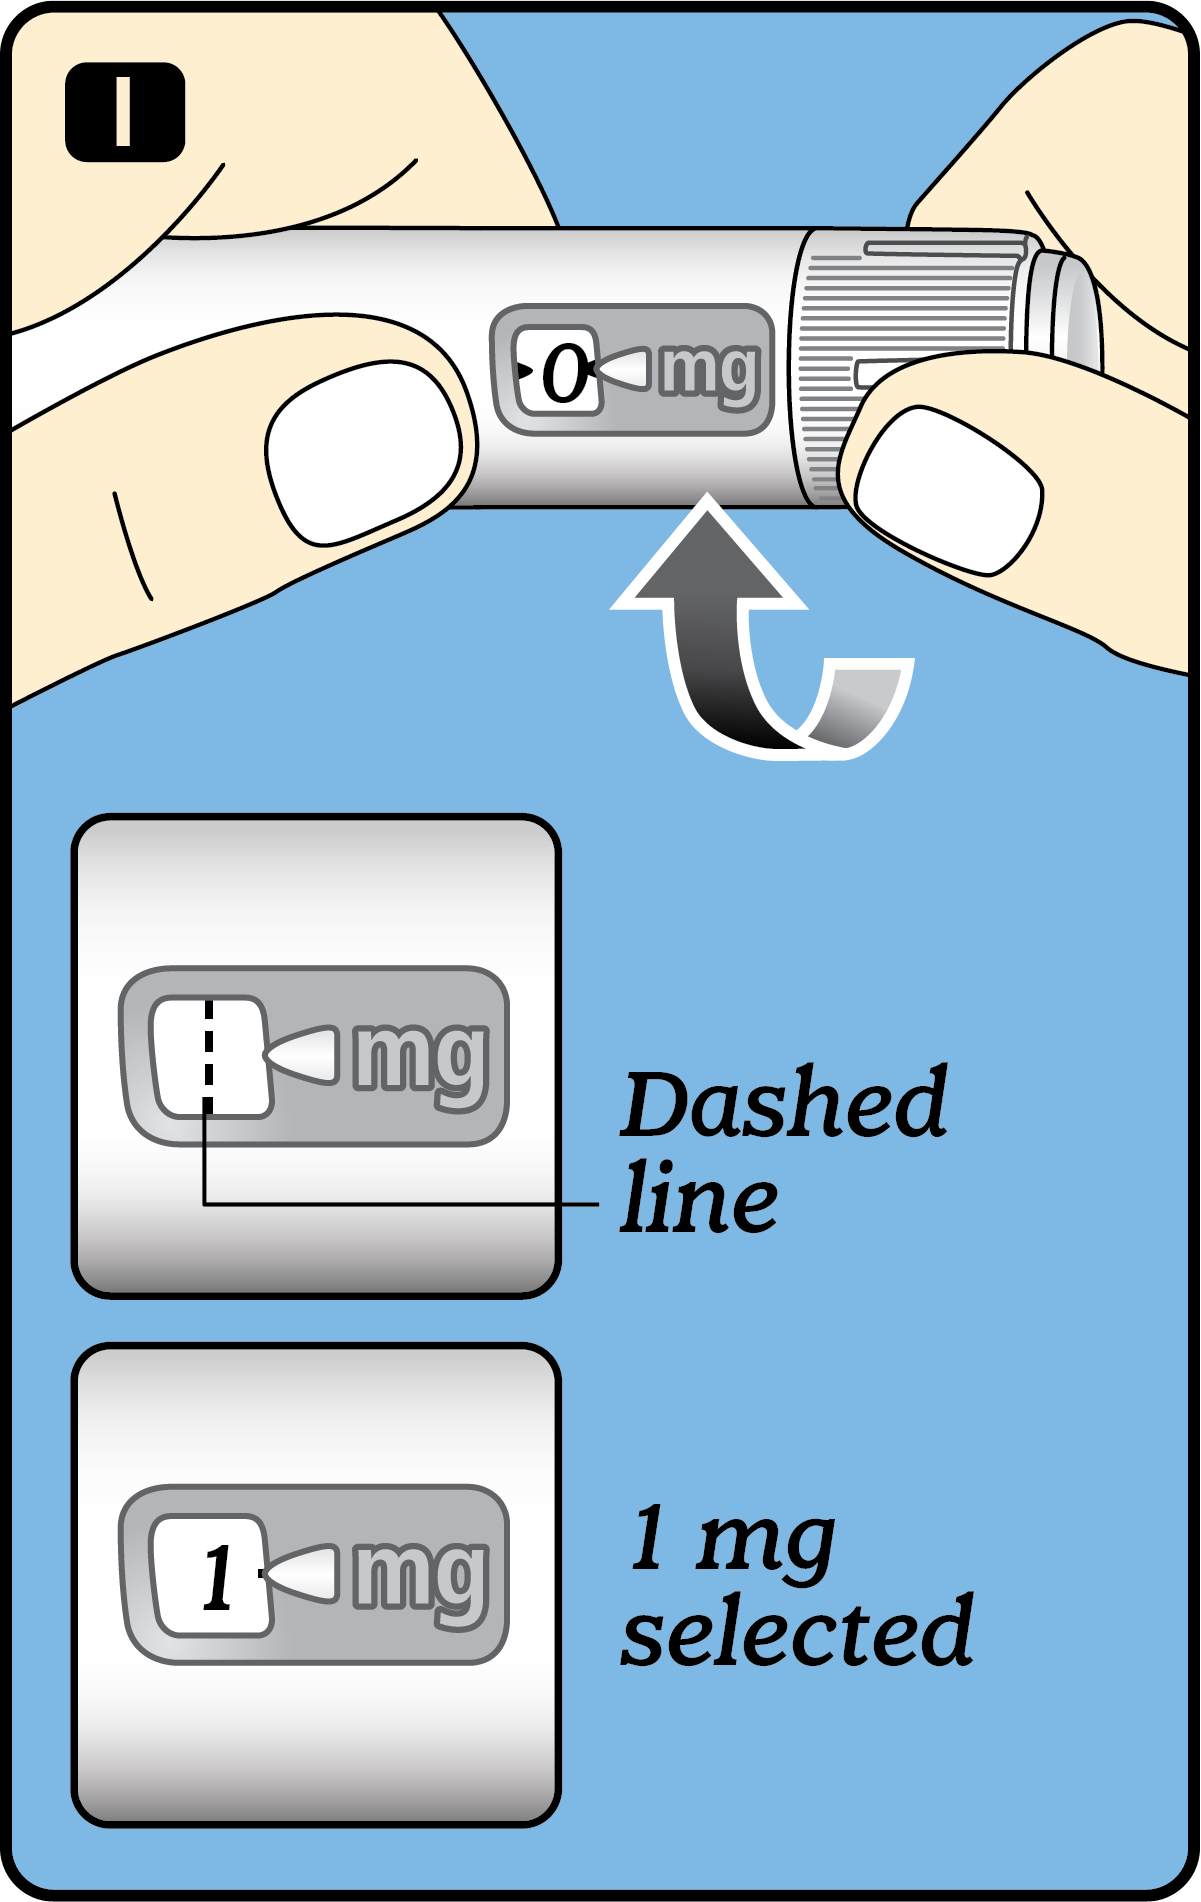
Step 9
1. Turn the dose selector until the dose counter stops and shows your desired dose according to below.
2. Dosage depends on how long you have been taking Semaglutide.
- Weeks 1-4 =0.25mg per week
- Weeks 5-9 =0.50mg per week
- Weeks 10-14 =0.75mg per week
- Weeks 15-19 =1.00mg per week
- Weeks 20+ =1.25mg per week
Step 10
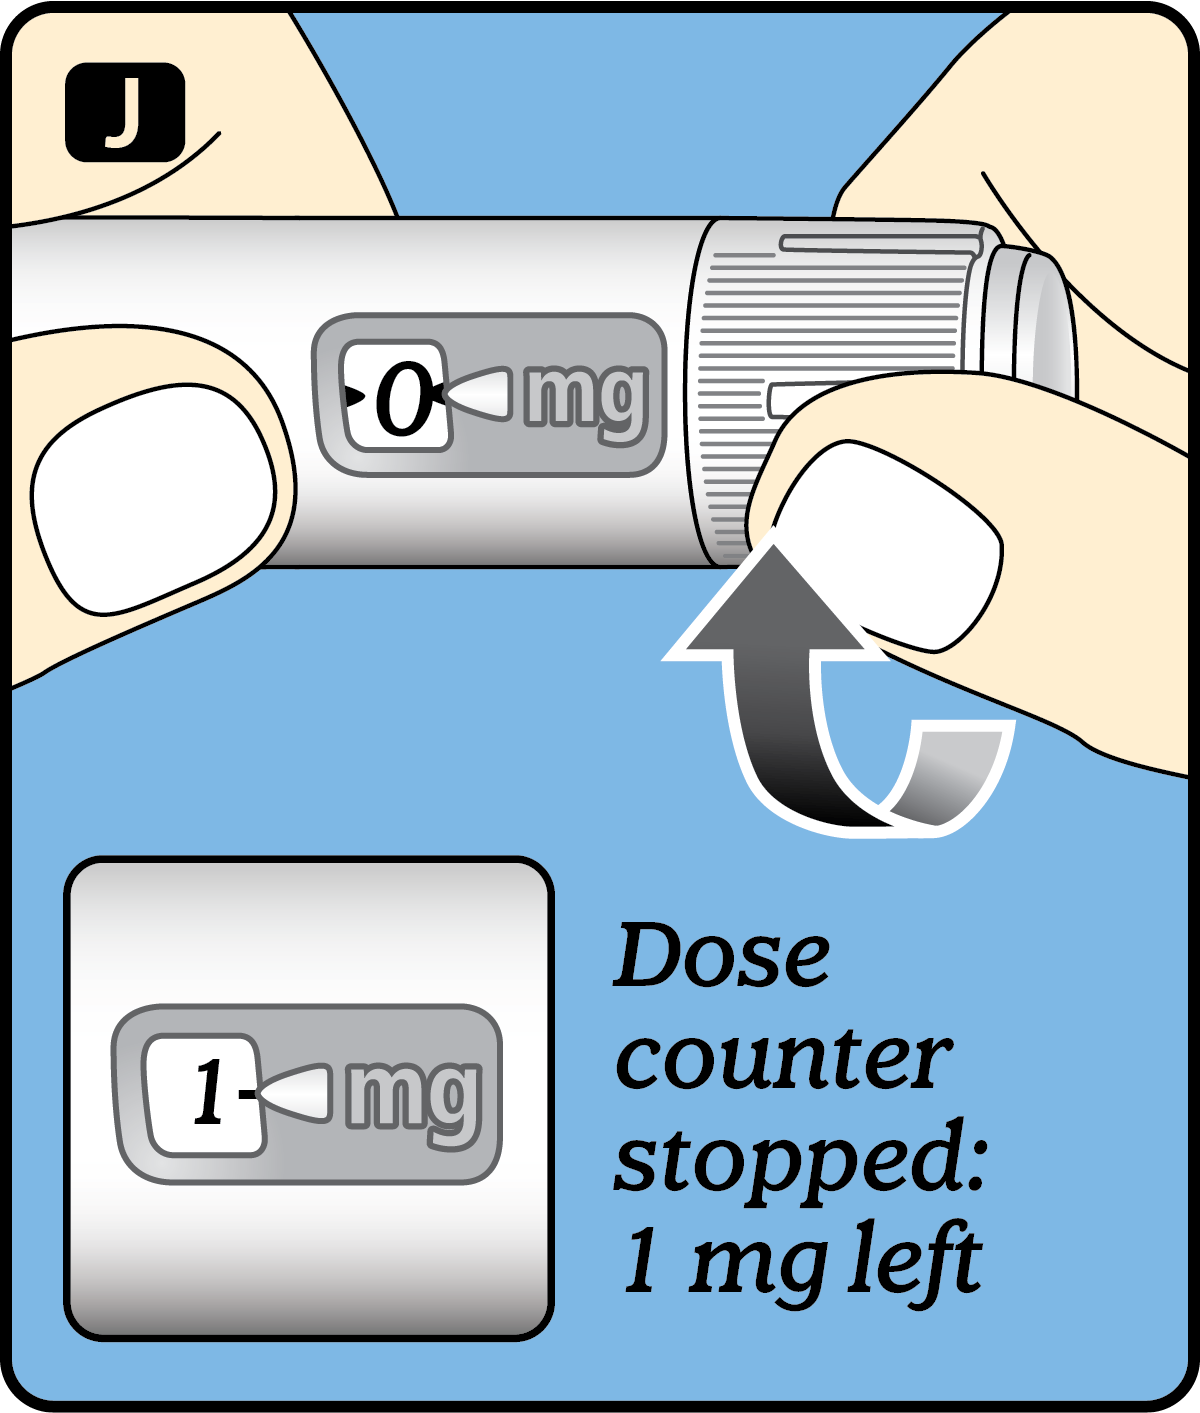
To see how much Semaglutide is left in your pen, use the dose counter:
1. Turn the dose selector until the dose counter stops.
2. If it shows 1, at least 1 mg is left in your pen. If the dose counter stops before 1 mg, there is not enough Semaglutide left for a full dose of 1 mg.
If there is not enough Semaglutide left in your pen for a full dose, do not use it. Use a new Semaglutide pen.
Step 11
Inject your dose
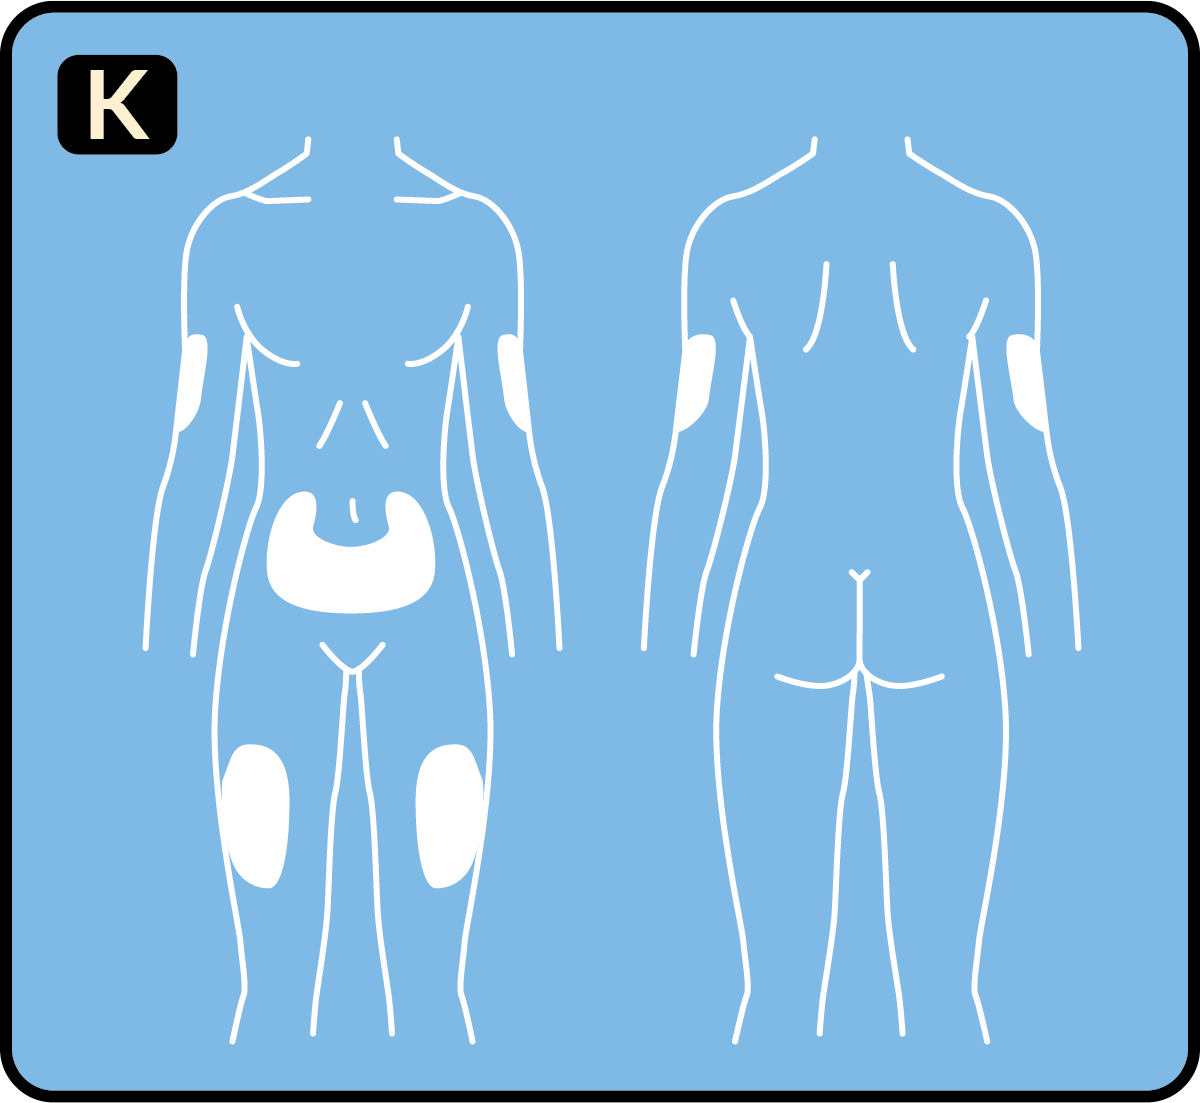
1. Choose your injection site and wipe the skin with an alcohol swab. Let the injection site dry before you inject your dose (See Figure K).
Step 12
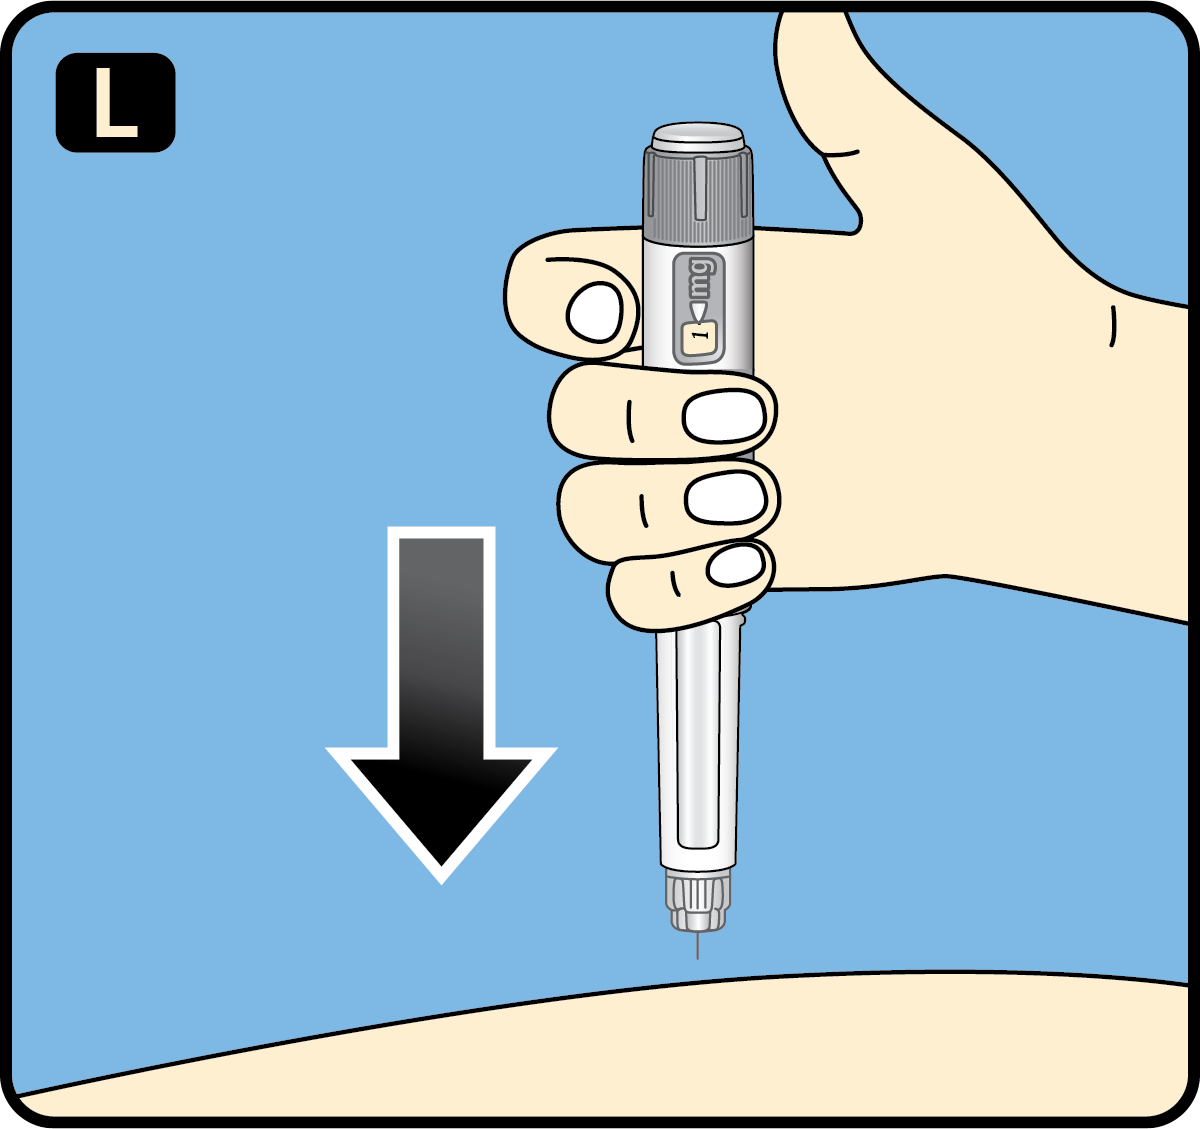
1. Insert the needle into your skin as your healthcare provider has shown you.
2. Make sure you can see the dose counter. Do not cover it with your fingers. This could stop the injection..
Step 13
1. Press and hold down the dose button until the dose counter shows 0.
2. The 0 must line up with the dose pointer. You may then hear or feel a click.
<> 3. Continue pressing the dose button while keeping the needle in your skin.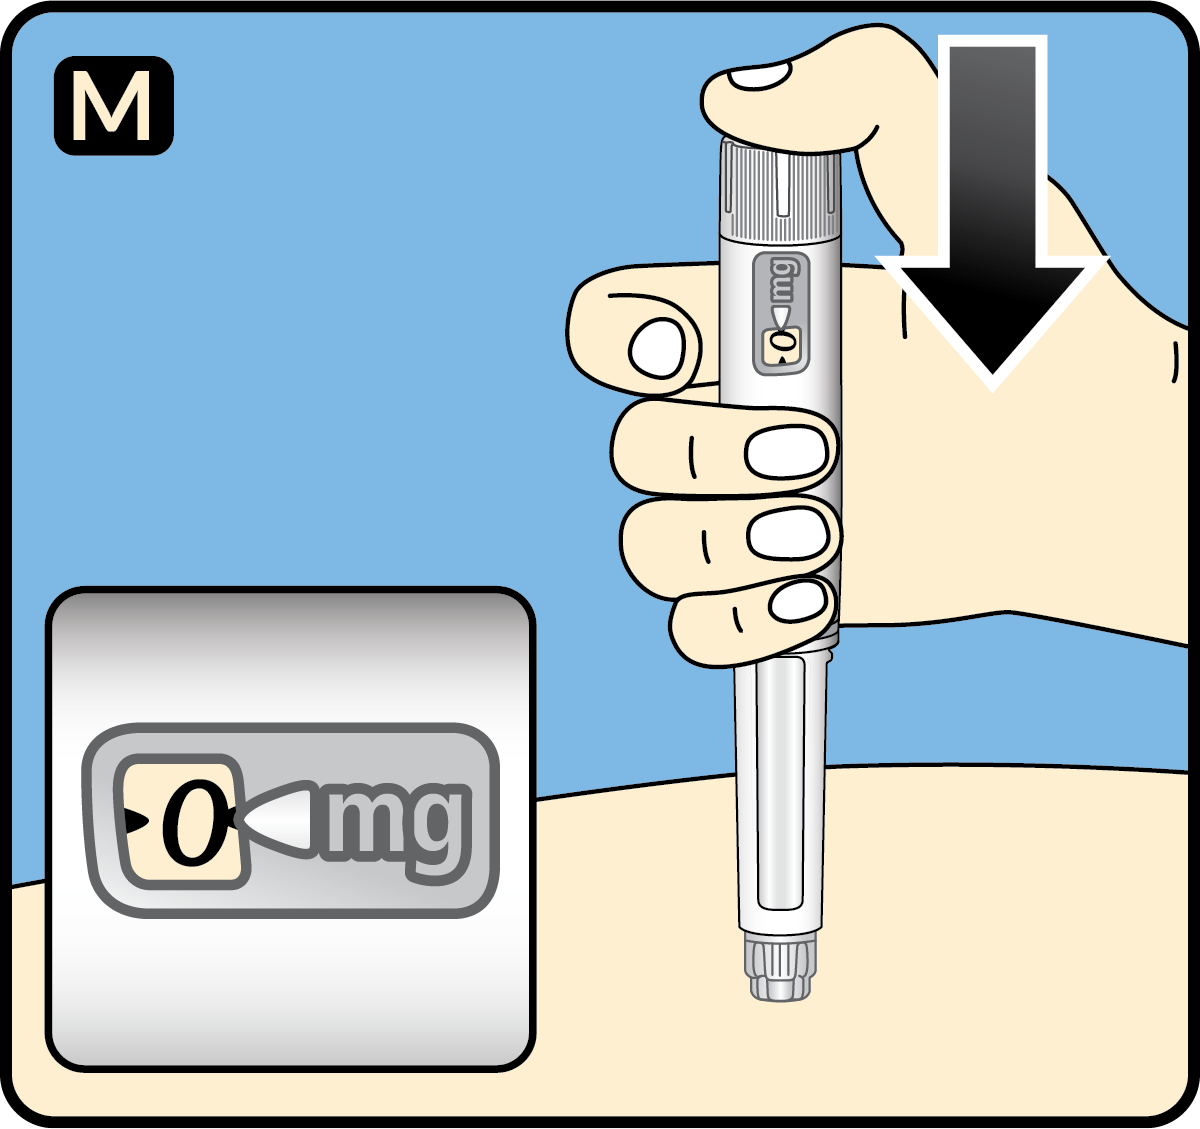
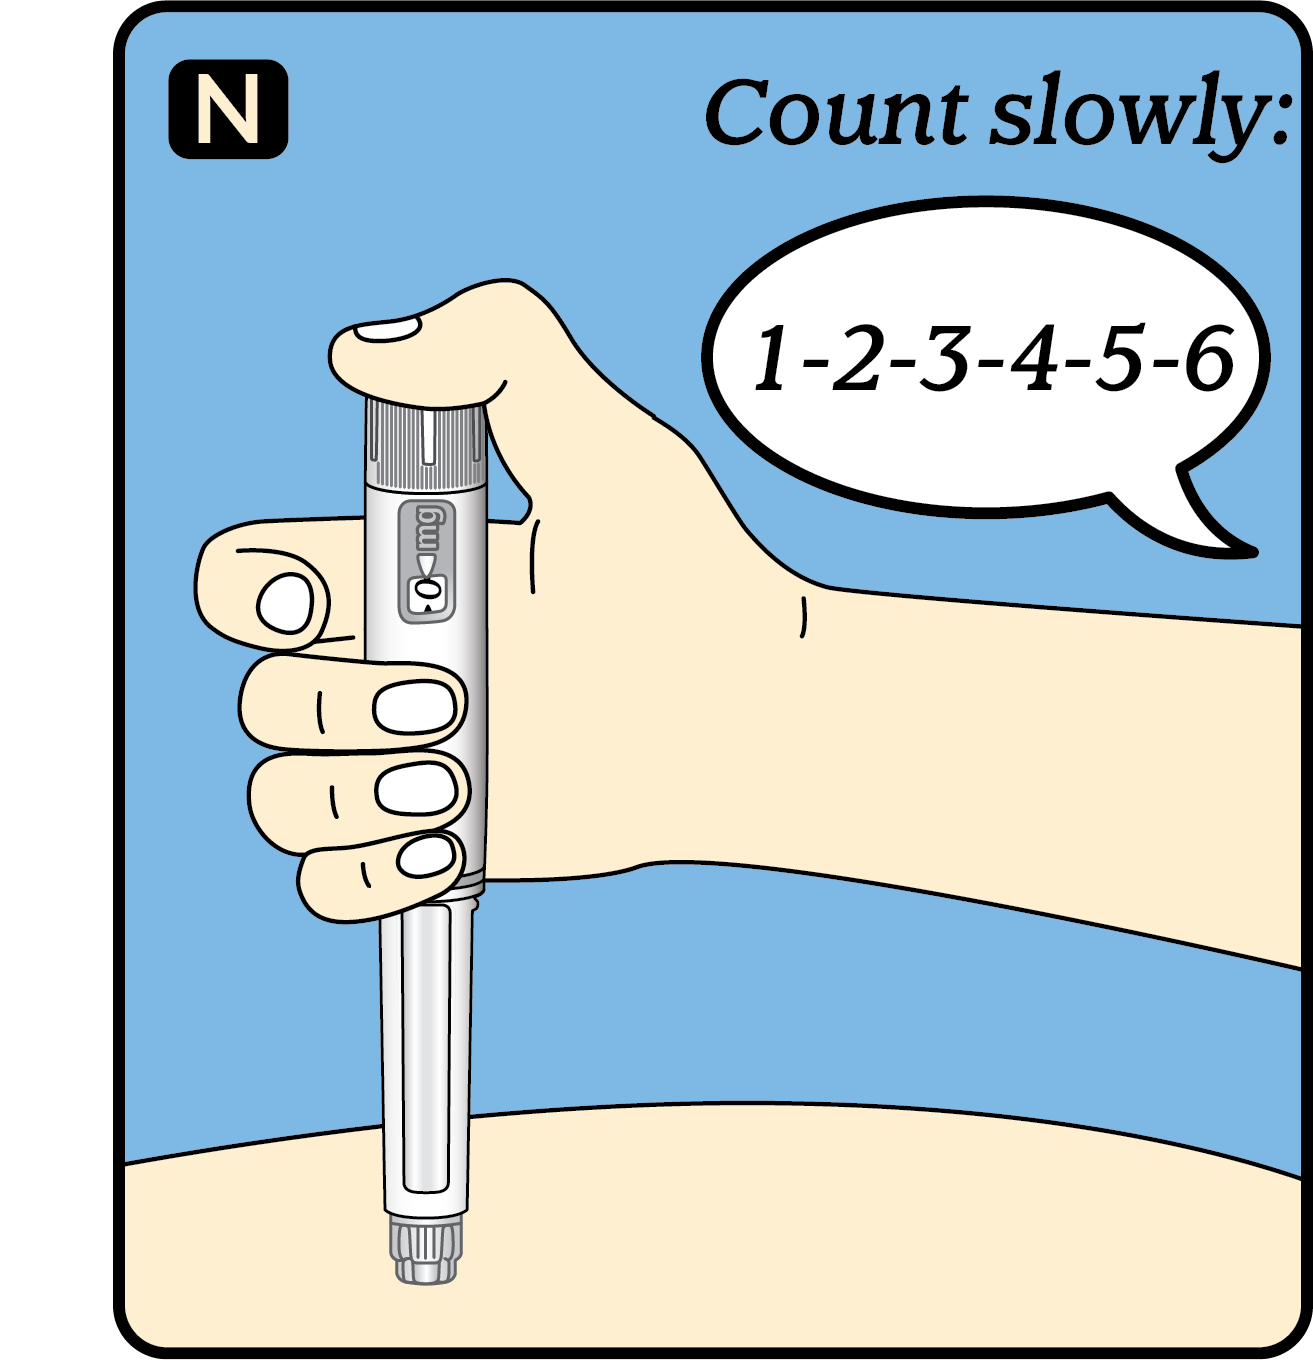
Step 14
1. Count 6 seconds while keeping the dose button pressed.
2. If the needle is removed earlier, you may see a stream of Semaglutide coming from the needle tip. If this happens, the full dose will not be delivered.
Step 15
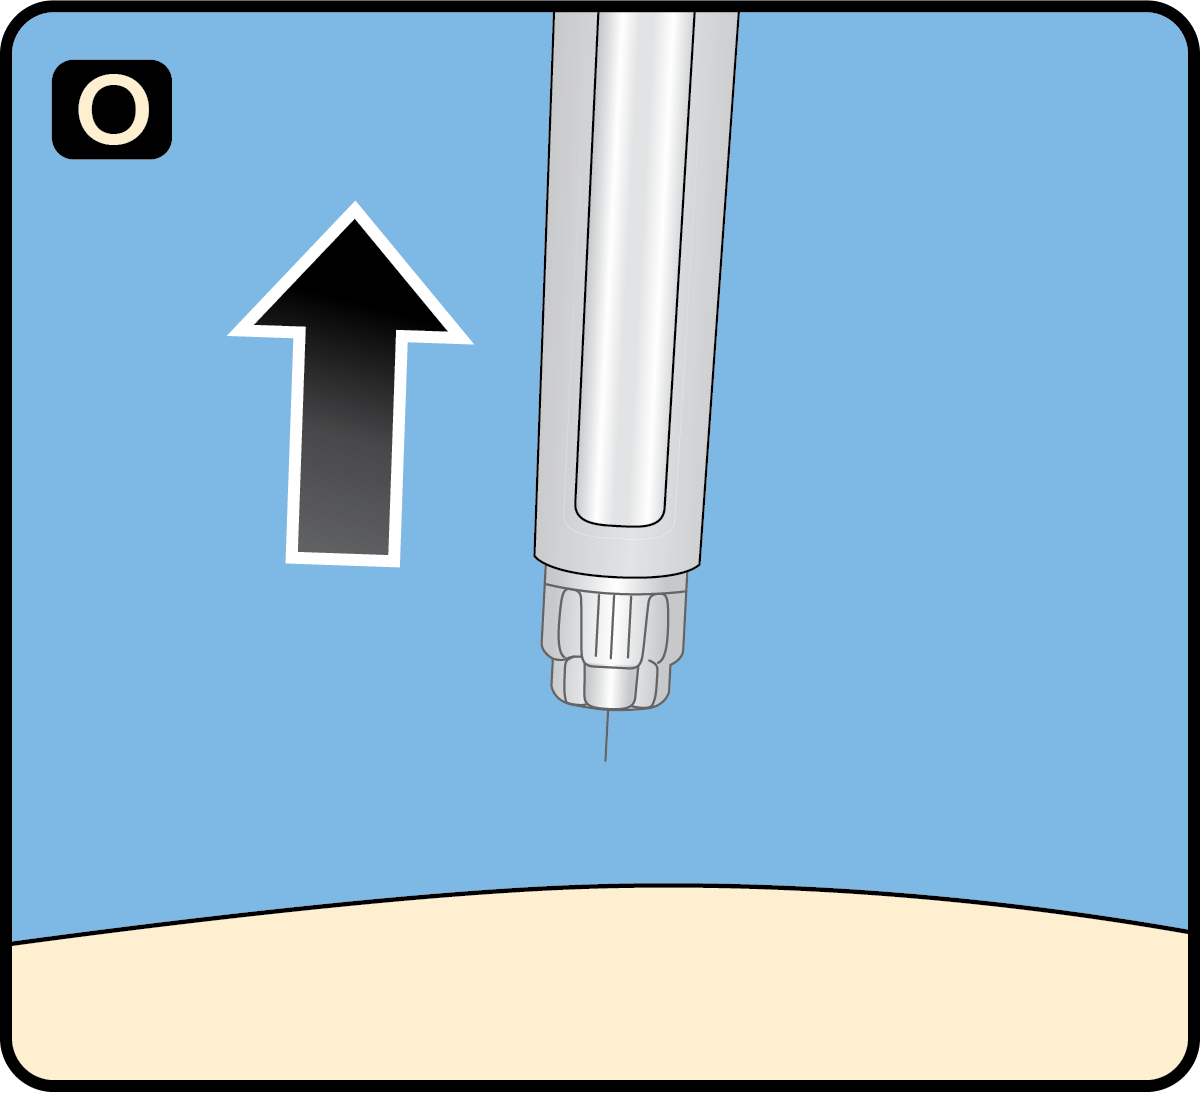
1. Remove the needle from your skin. You can then release the dose button. 2. If blood appears at the injection site, press lightly with a gauze pad or cotton ball.
Do not rub the area.
Step 16
After your injection
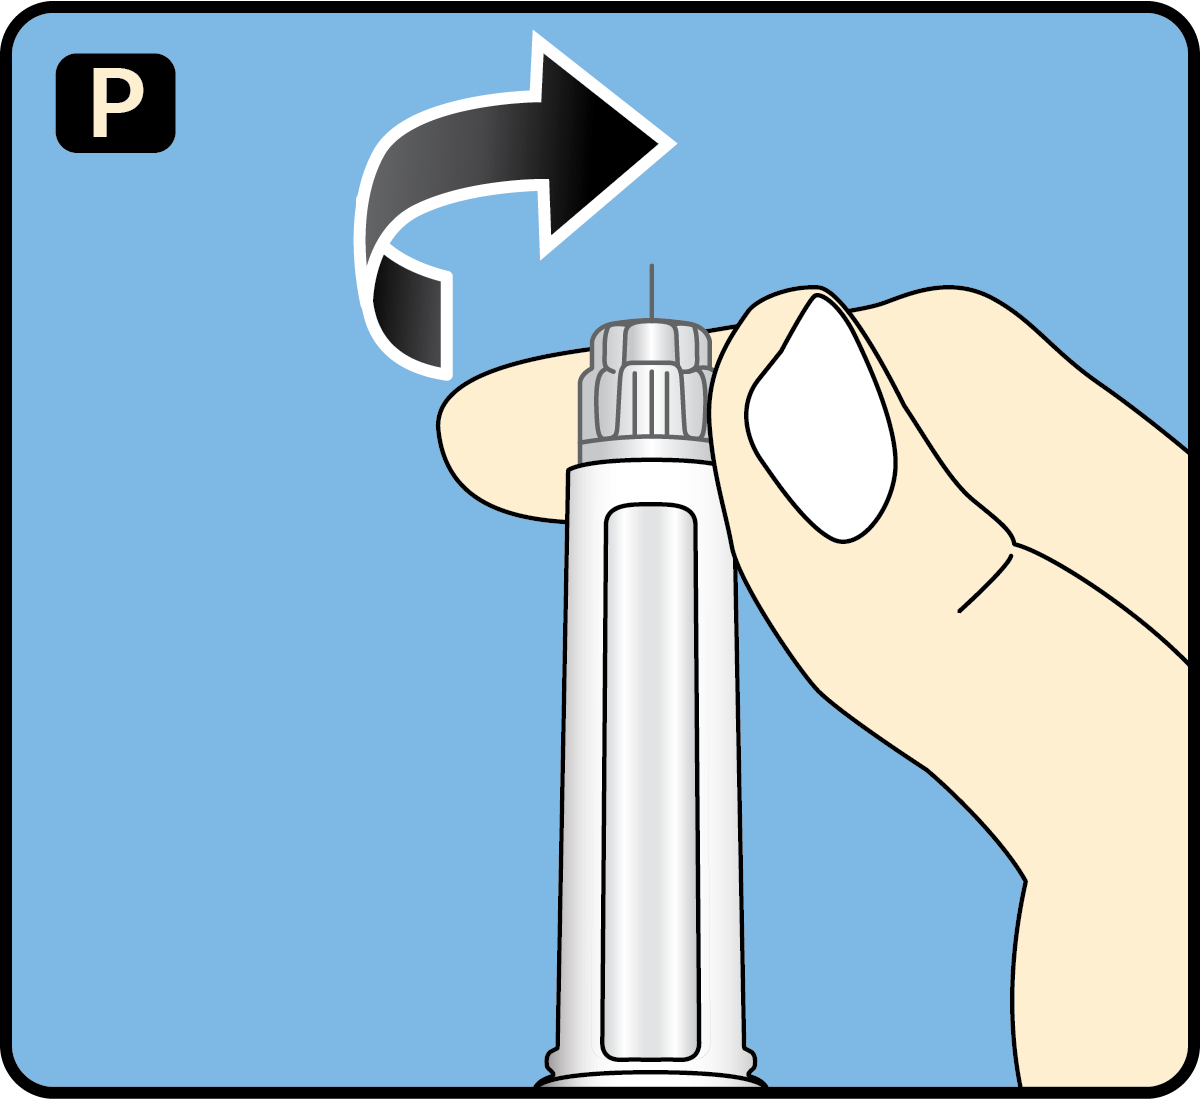
1. Carefully remove the needle from the pen. Do not put the needle caps back on the needle to avoid needle sticks.
Step 17
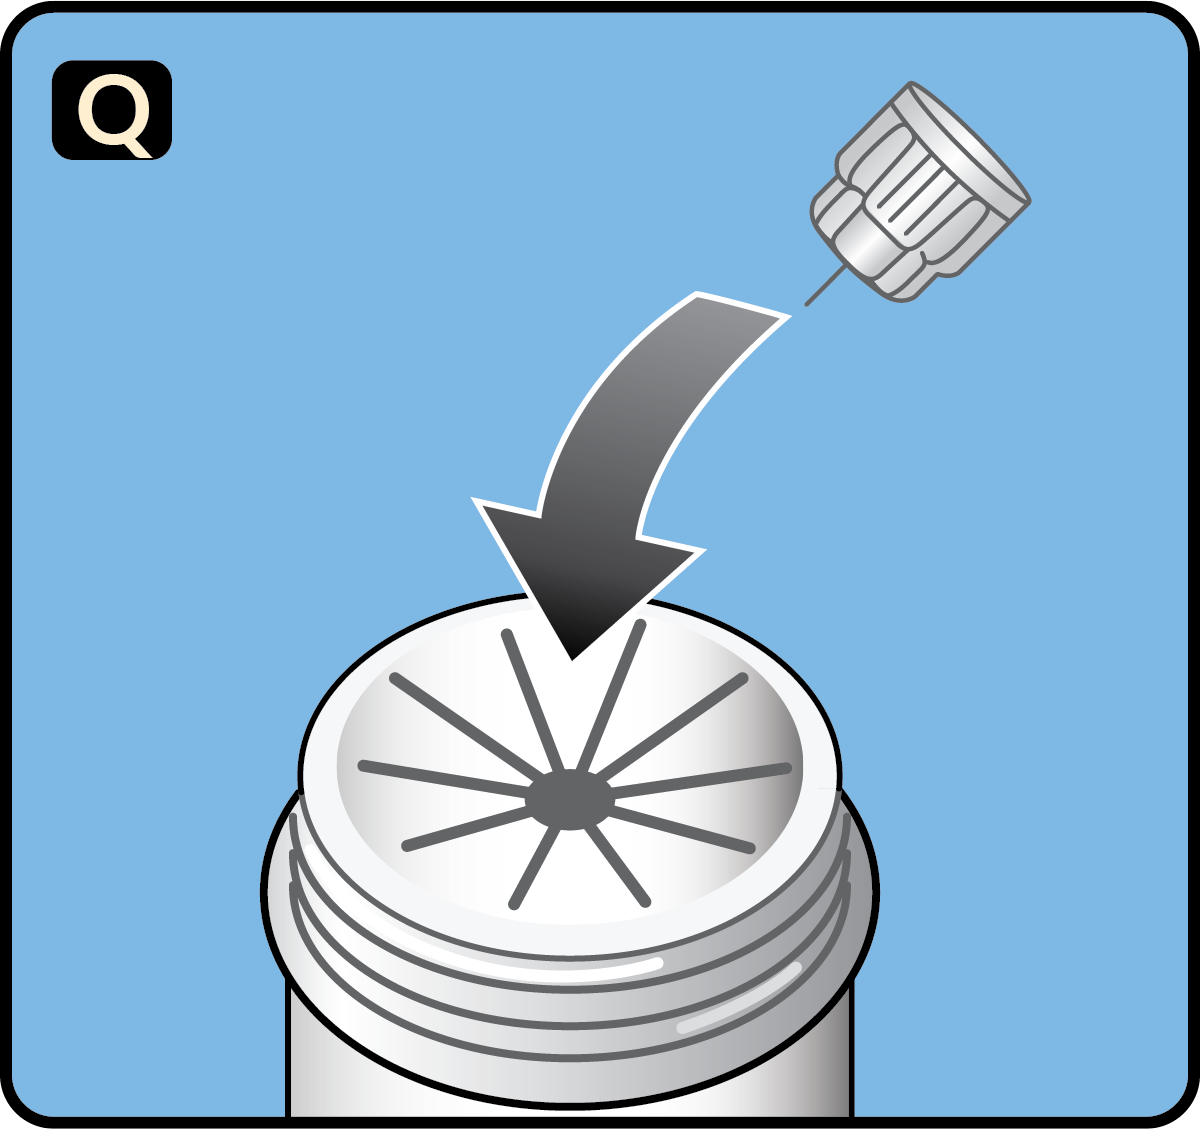
1. Place the needle in a sharps disposal container right away to reduce the risk of needle sticks.
Step 18
1. Put the pen cap on your pen after each use to protect Semaglutide from light.
Step 19
1. If you do not have a sharps disposal container, follow a 1-handed needle recapping method. Carefully slip the needle into the outer needle cap. Dispose of the needle in a sharps disposal container as soon as possible.
2. Never try to put the inner needle cap back on the needle. Always remove the needle from your pen.
3. Always dispose of the needle after each injection.